EVM compatibility has been a game-changer for popular Layer 1 blockchains like Avalanche, BNB Smart Chain, Polygon, and more. The Ethereum Virtual Machine (EVM) reduces barriers to entry by enabling developers to deploy smart contracts on these new networks with minimal hassle.
Adding a custom EVM network on Trust Wallet enables you to store, send, receive coins and tokens, and even connect to Web3 decentralized applications (dApps) on that network.
Note:
A malicious network provider can lie about the state of the blockchain and record your network activity. Only add custom networks you trust.
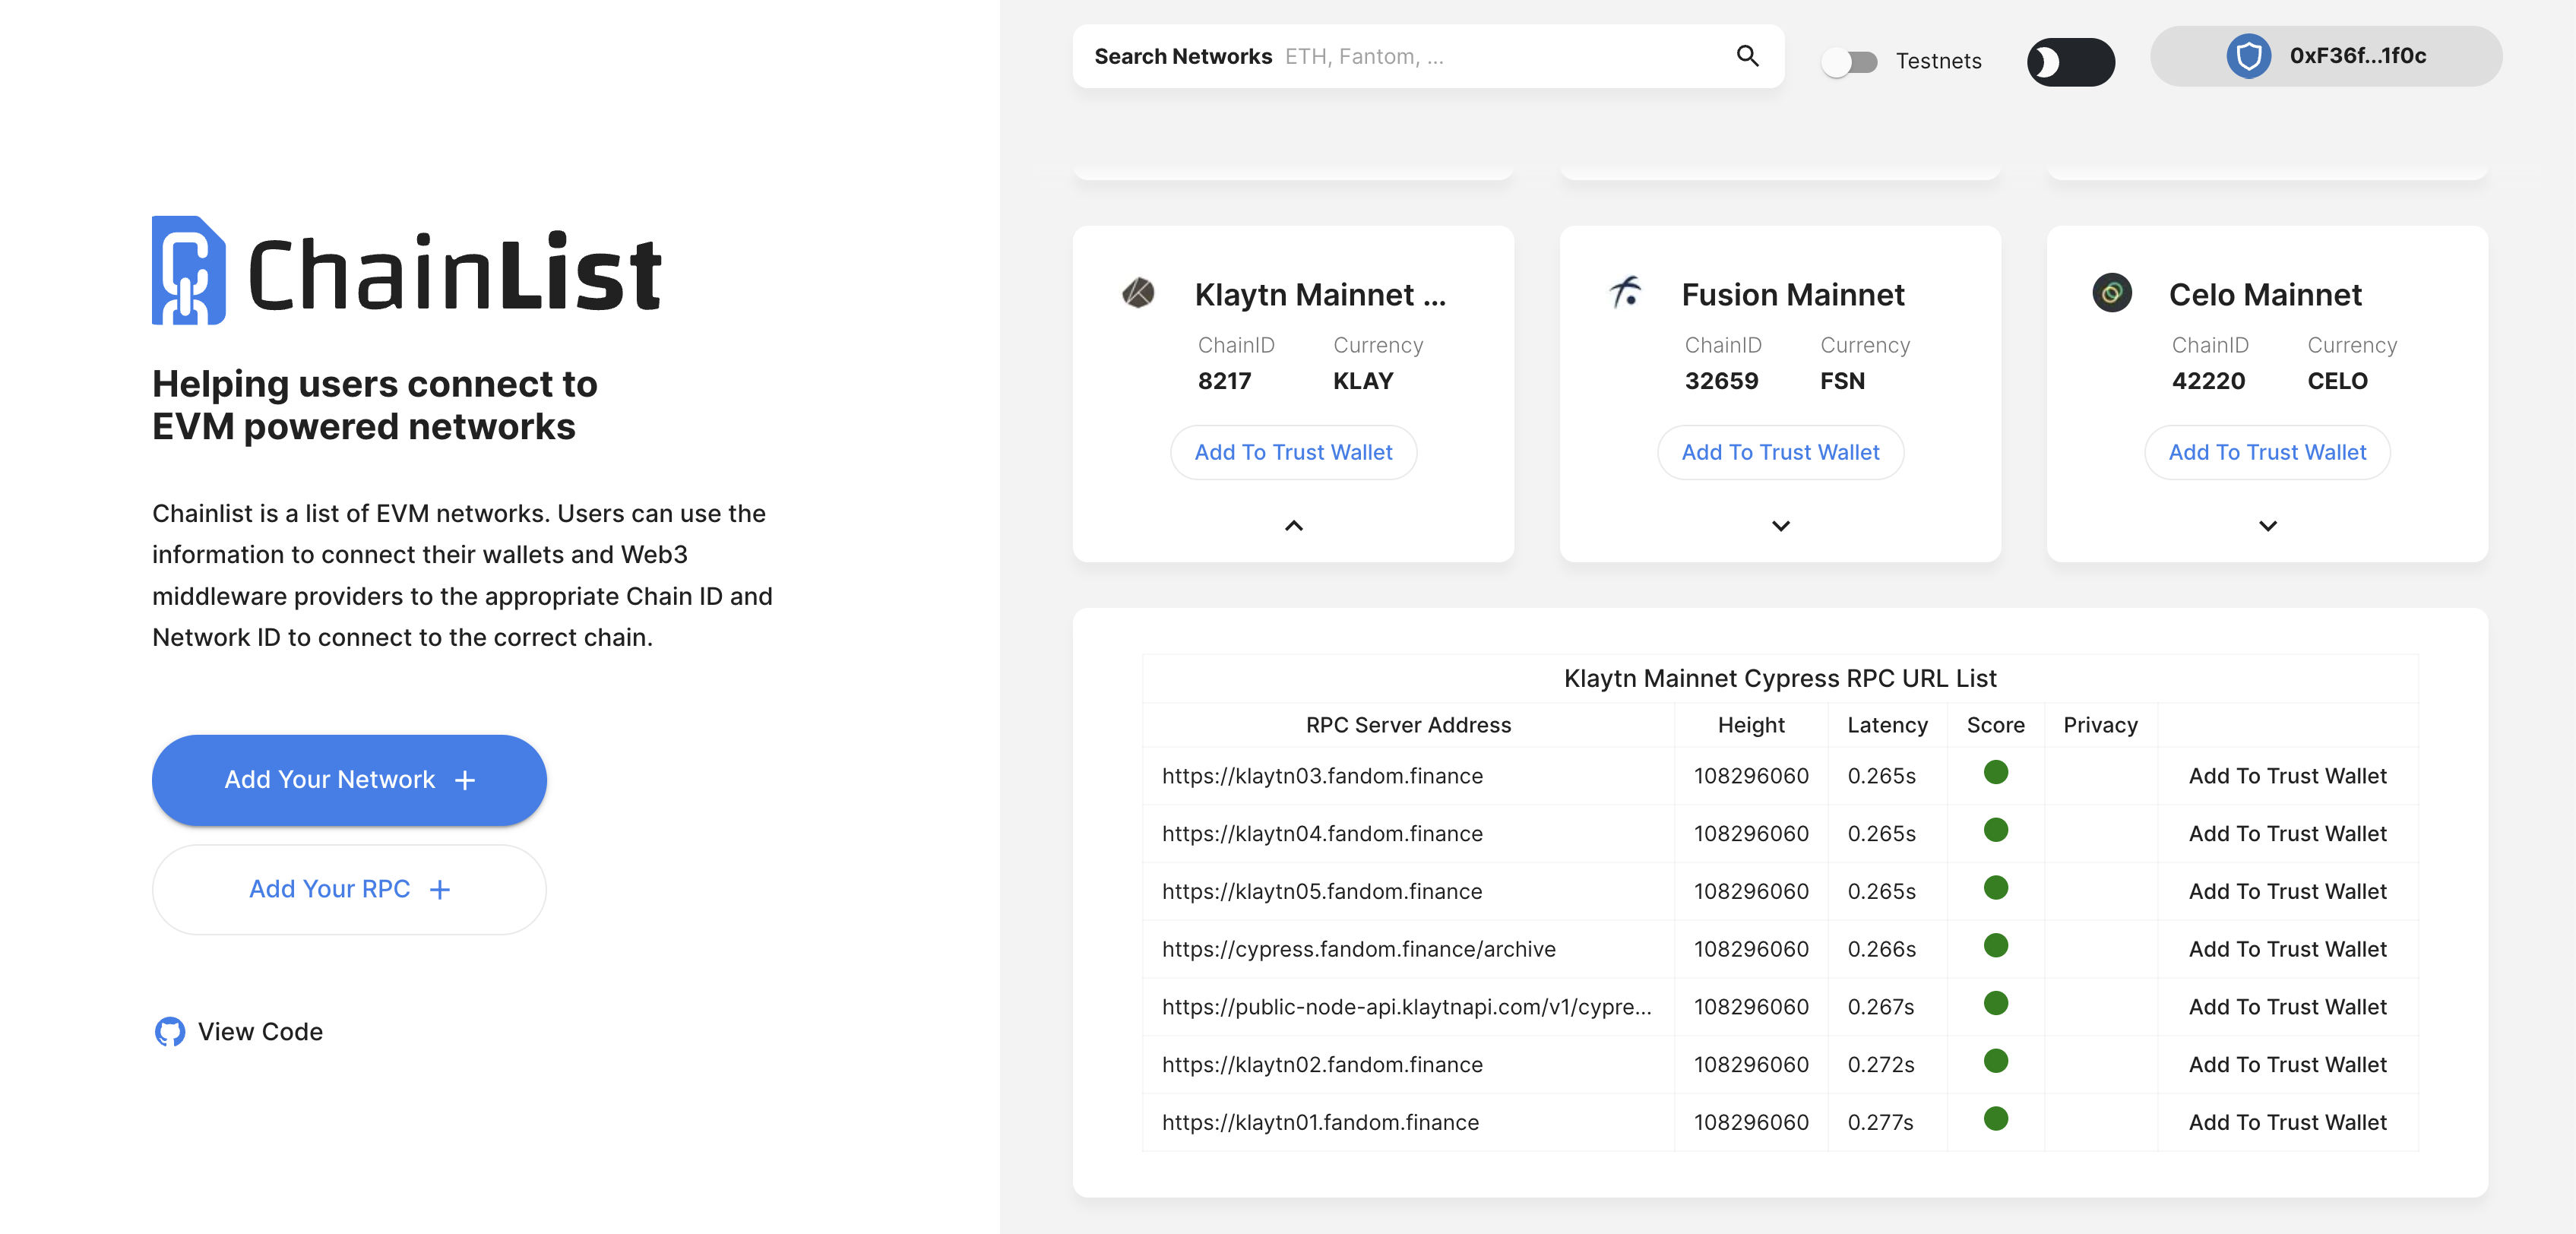
Step 1: Get Network Information
Using Chainlist, search for the chain that you will add. You need to find the RPC node url with a green-colored status.
Step 2: Open Custom Network Screen
Open the Trust Wallet Mobile App. Select the manage assets icon in top right corner from the main wallet page.
Then select ‘+’ button.
Switch to the ‘Network’ tab once the custom Token/Network page appears.
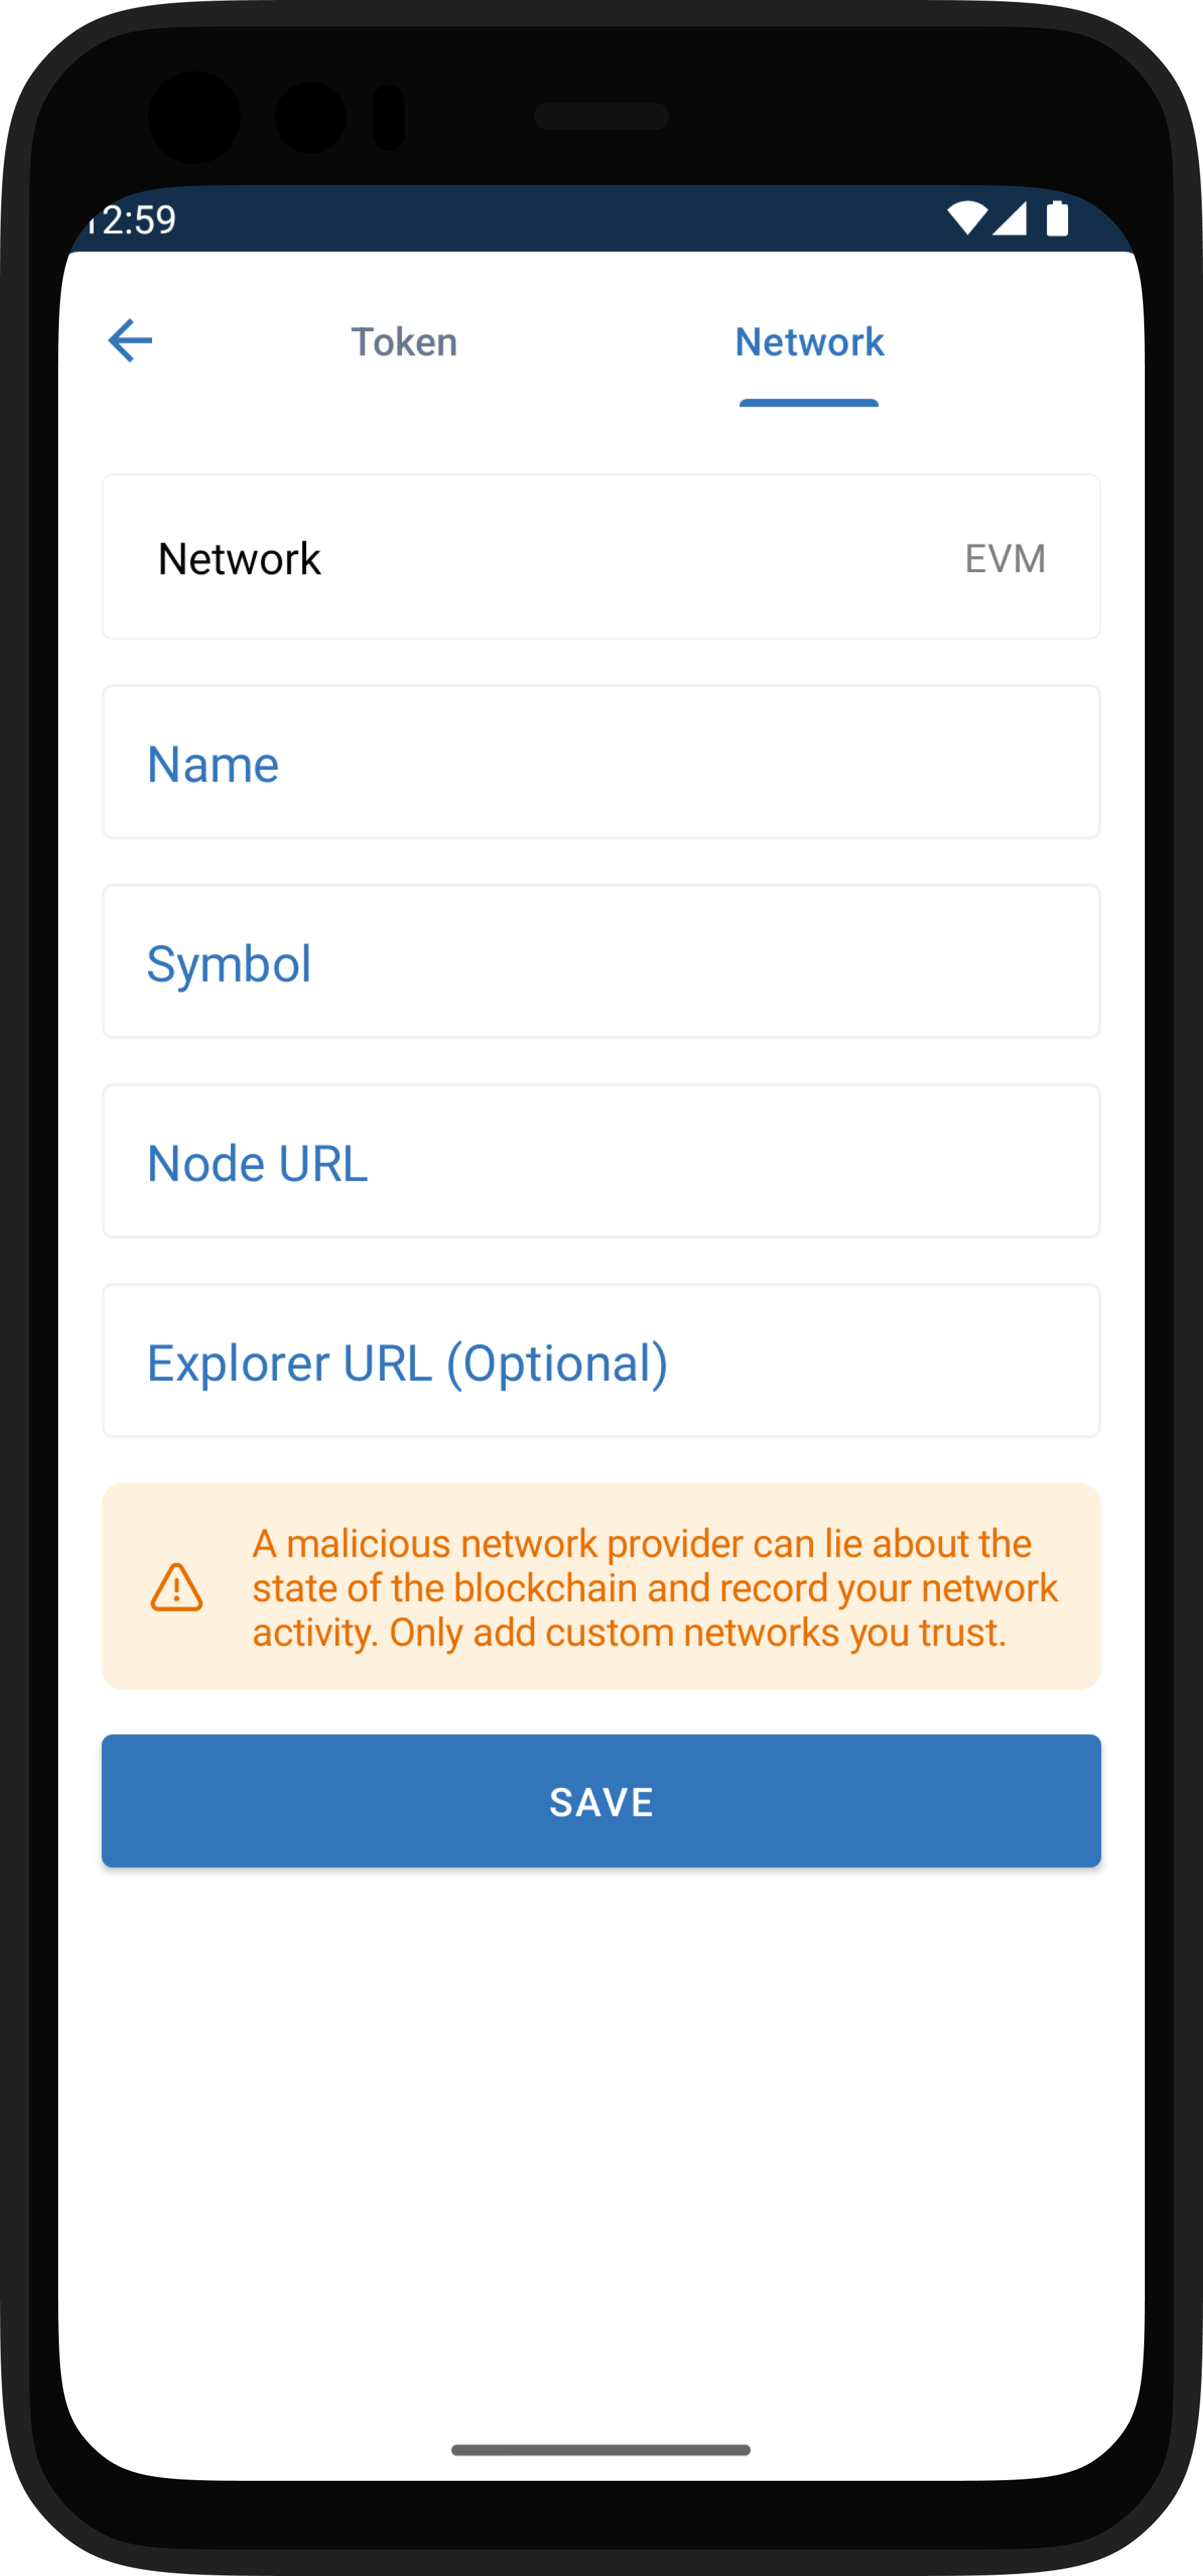
Step 3: Enter the Network Details
Make sure that you’ve selected the correct Network. For this guide, we need to have EVM on the supported Network, since this is EVM based.

Important!
Please make sure that network information is correct, and only add a trusted RPC node url.
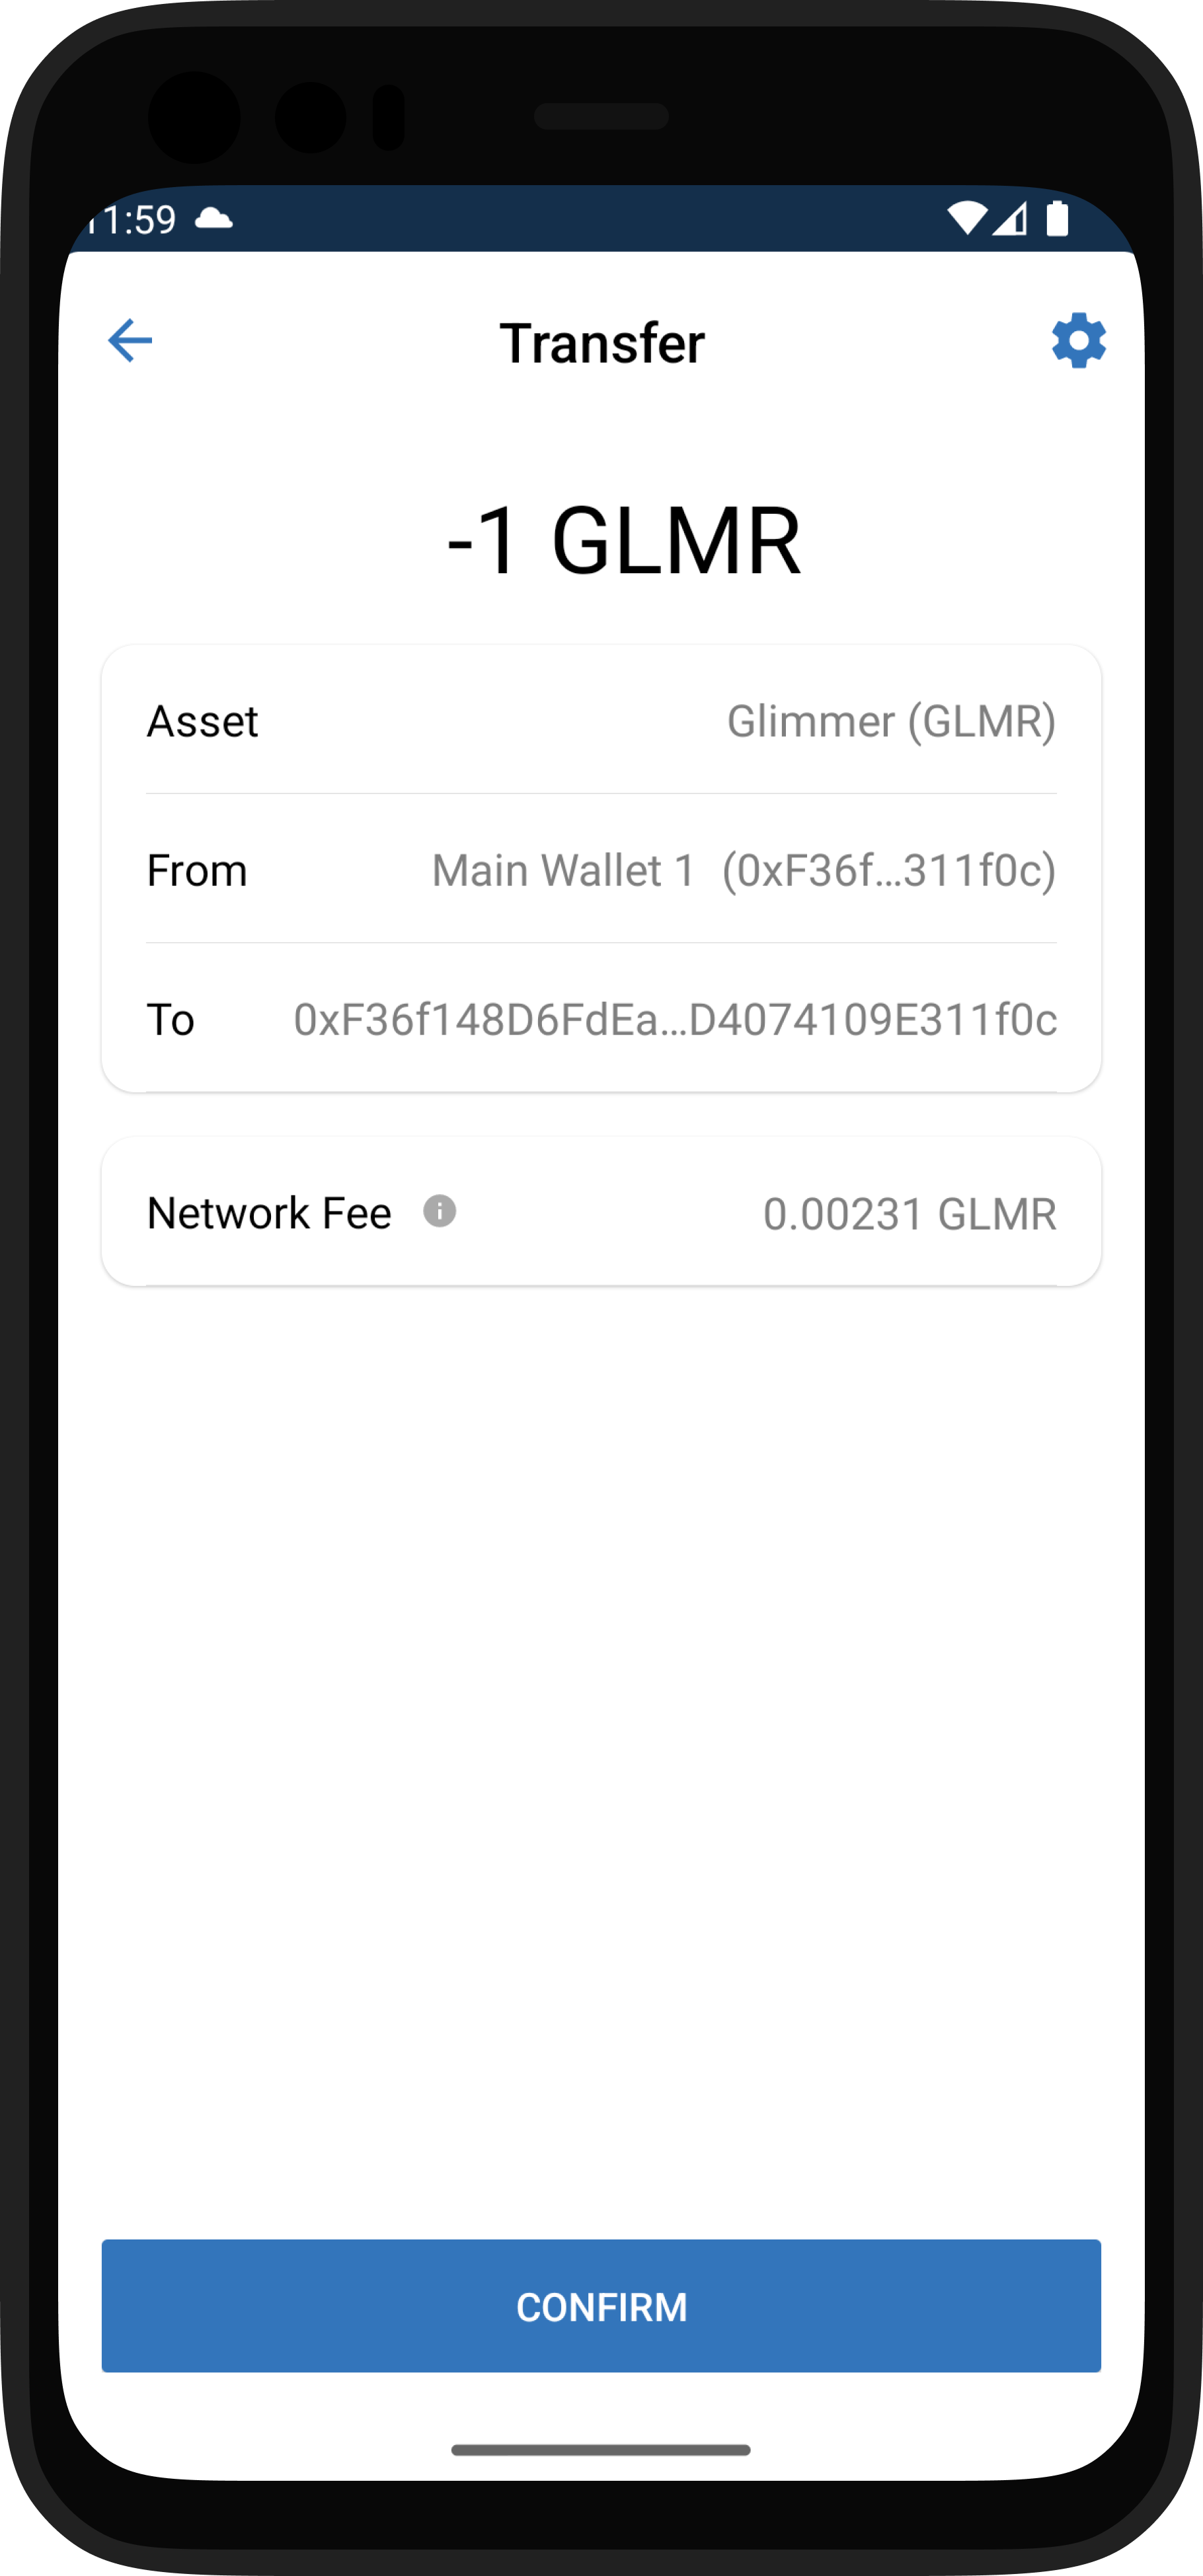
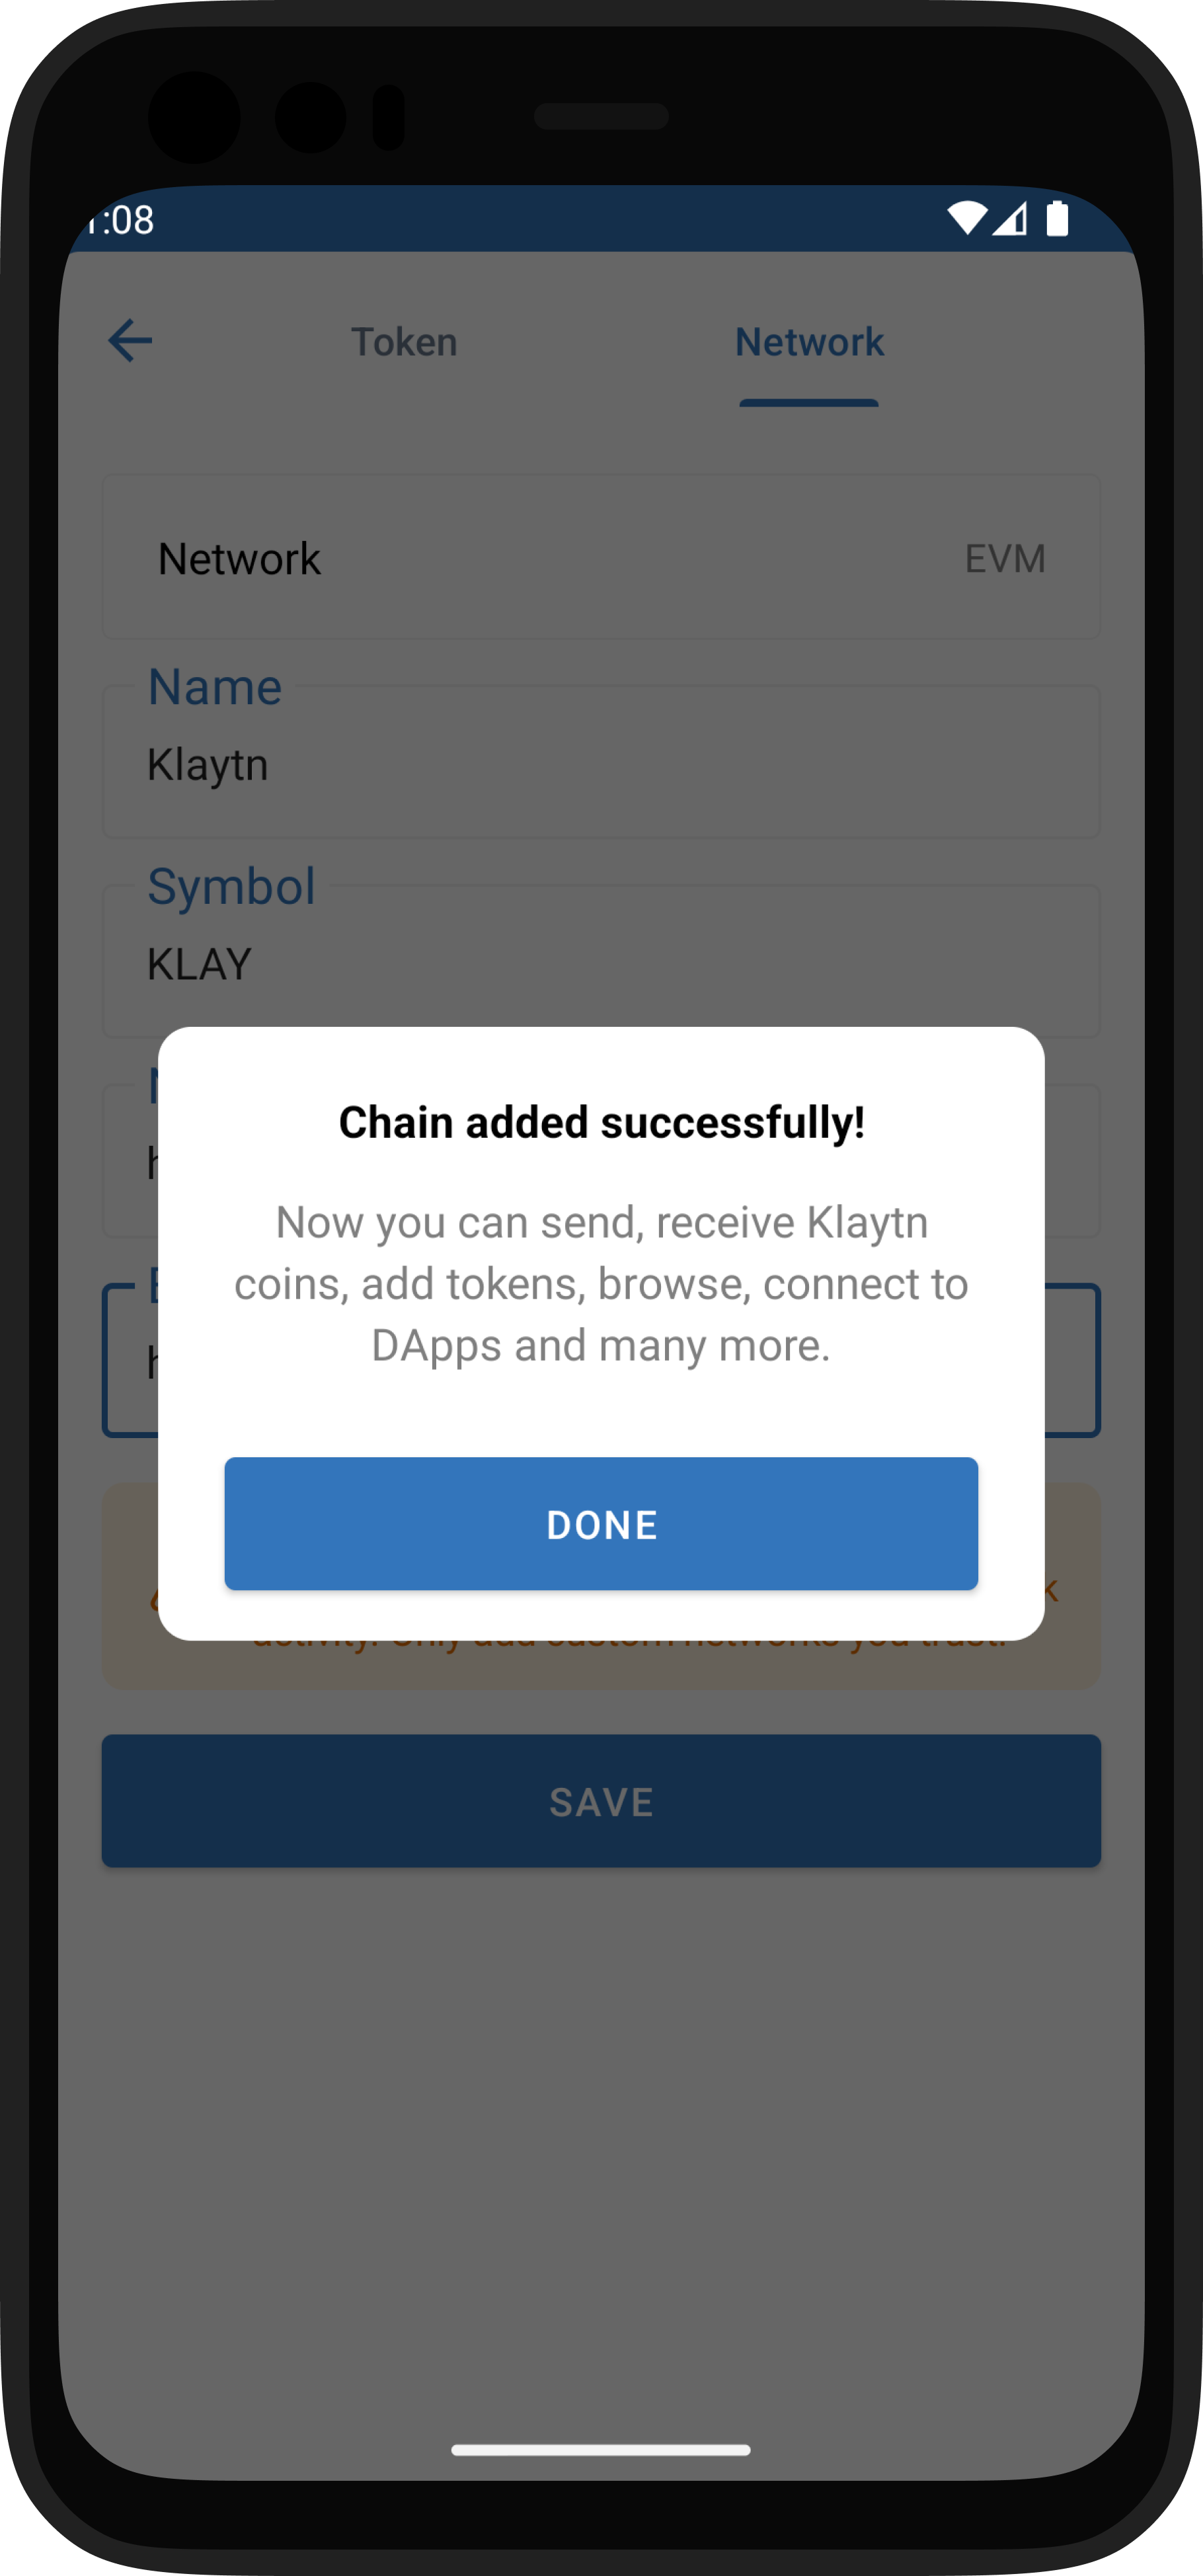
Step 4: Network Successfully Added
And that’s it! You’ve successfully added a Custom Network.
Note: If the chain is not yet verified on Trust Wallet assets repository, the price information and icon will not show up.
Tip:
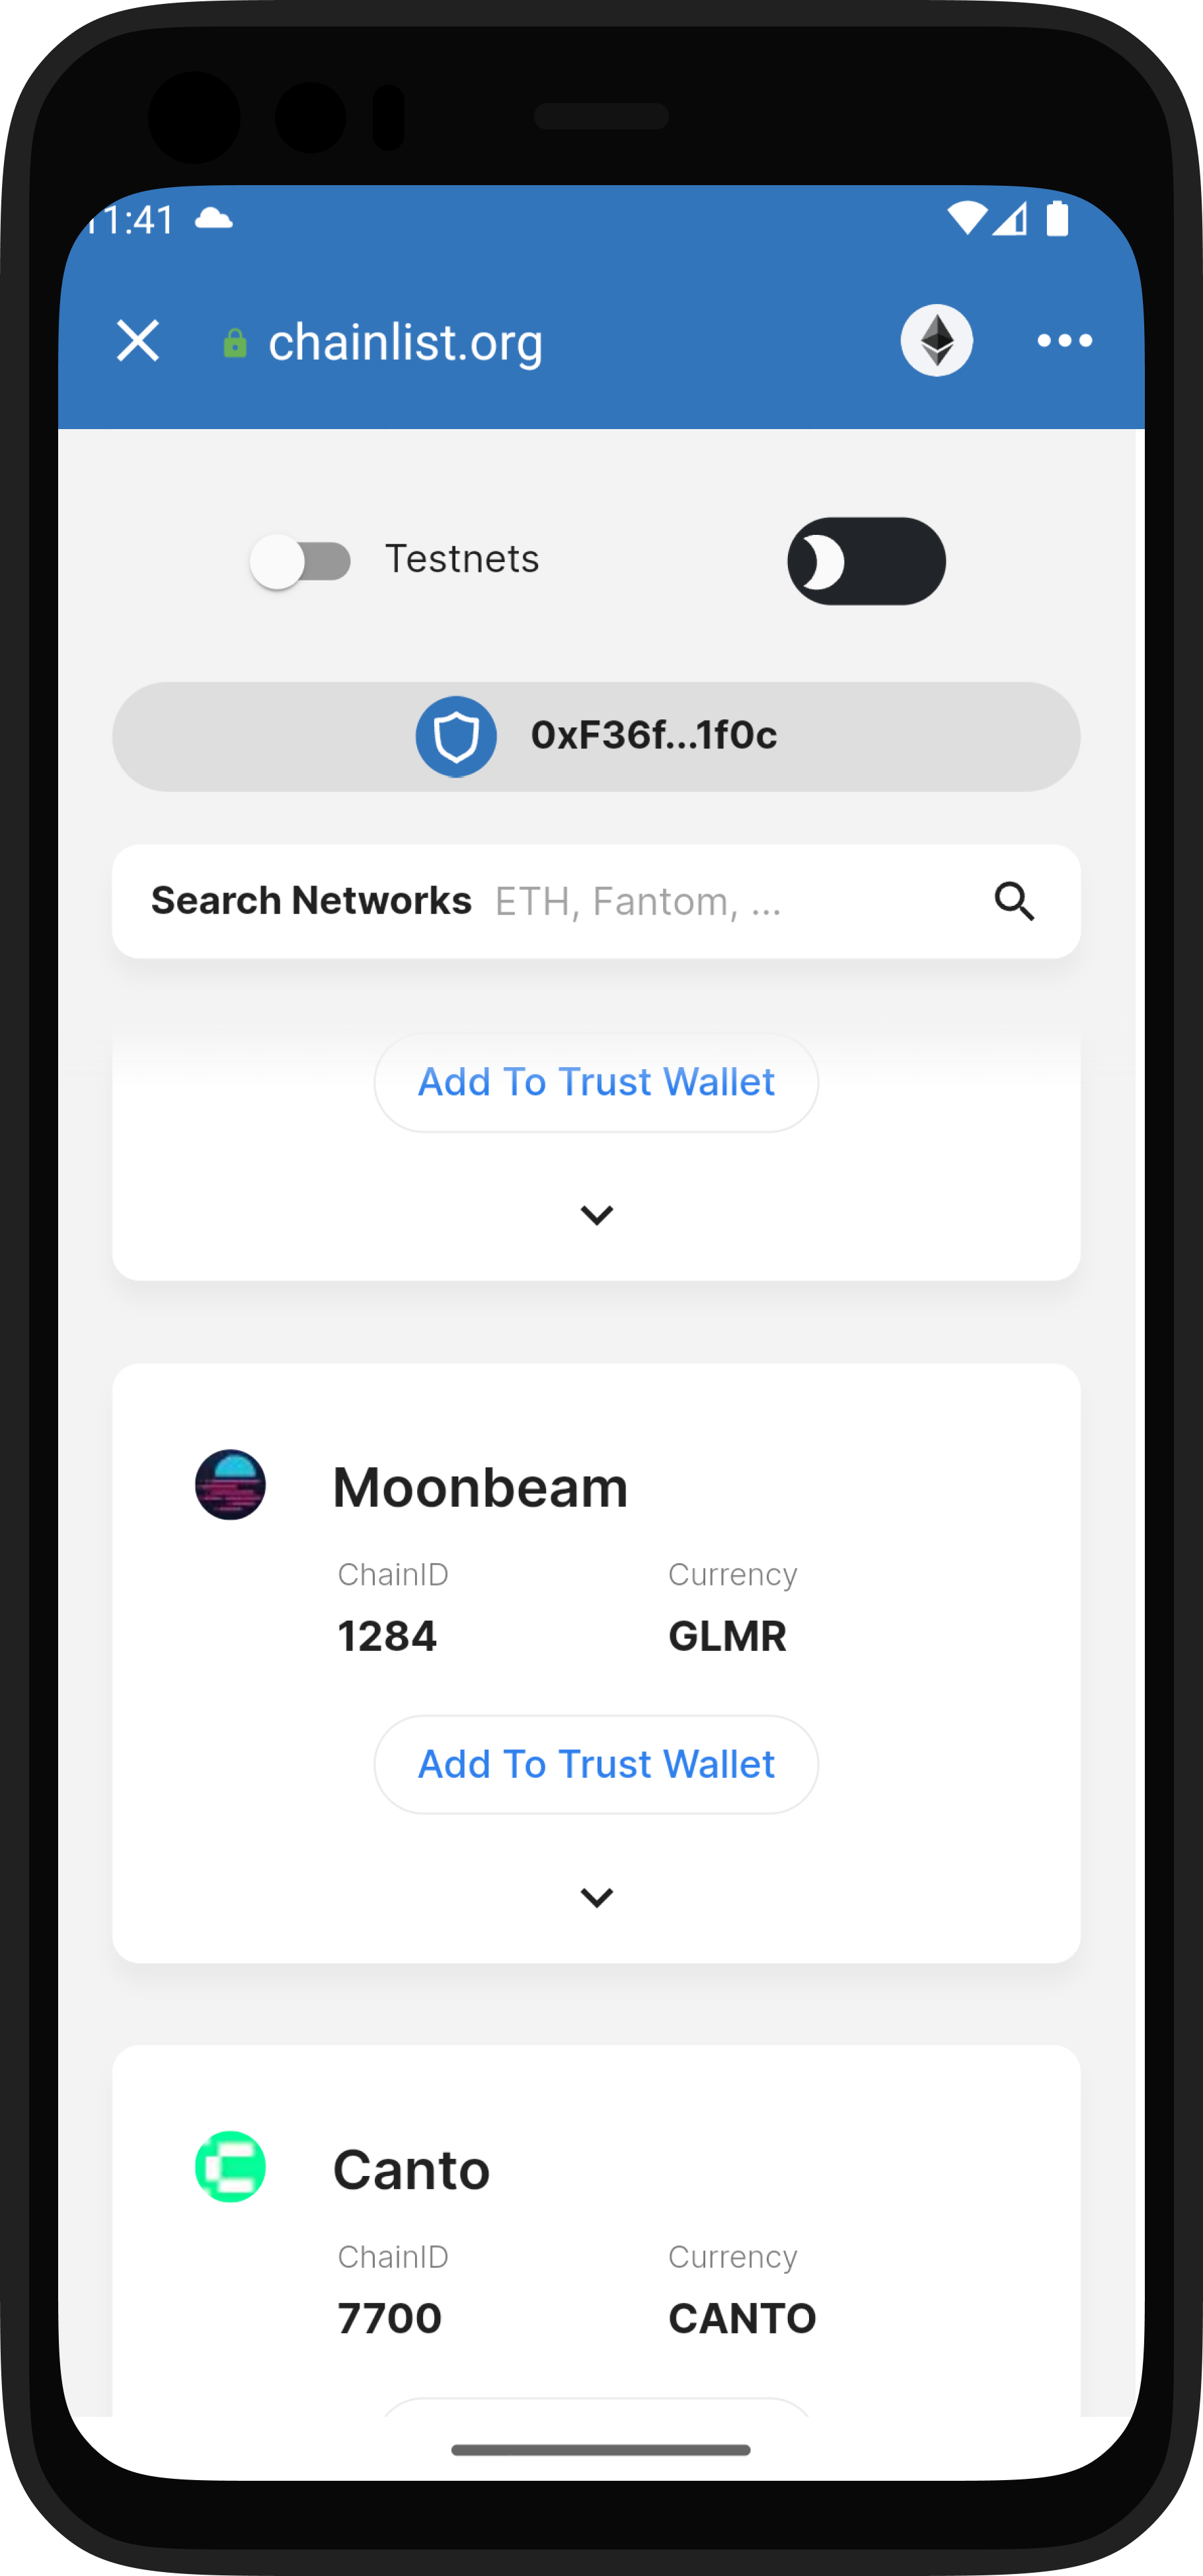
Use the Chainlist aApp to add network automatically.
To do so, open this web app in dApp browser, select connect, select chain and select Add to Trust Wallet.