Access your Ledger wallet using the Trust Wallet Browser Extension
In this guide, we’ll show you how to access your Ledger wallet via the Trust Wallet Browser Extension. You’ll also discover how to use the “multi-wallet” feature to seamlessly toggle between multiple wallets, including your Ledger.
Combining your Ledger with Trust Wallet allows you to store your private keys completely offline in your Ledger device while leveraging the seamless functionality of Trust Wallet to manage your crypto assets and safely access Web3 decentralized applications (dApps).
Contents
- Everything you need to get started
- Connect your Ledger to Trust Wallet
- Your Ledger address vs your Trust Wallet address
- Manage multiple wallets, including Ledger, using “Multi-wallet”
- Send crypto from Ledger via Trust Wallet
- Sign dApp transactions from your Ledger via Trust Wallet
Before you start, here’s what you need
- The Trust Wallet Browser Extension installed on your web browser. Download it here.
- A Ledger hardware wallet connected to your computer.
- The Ledger Live software closed on your computer, as this may conflict with the Browser Extension.
Important note regarding using Ledger with Trust Wallet:
-
Ledger connectivity with the Trust Wallet Browser Extension is currently not supported on Firefox. Please use Chrome, Brave, Opera, or Edge.
-
Ledger support is currently available for the Trust Wallet Browser Extension only. Follow us on Twitter @TrustWallet so you know when we add support for the Trust Wallet Mobile App.
-
Only EVM-compatible blockchains are supported on your Ledger via Trust Wallet at this time. That includes Ethereum, BNB Chain, Polygon, Avalanche, and all other EVM blockchains. Stay tuned as we add more!
Connect your Ledger to the Trust Wallet Browser Extension
Step 1: Open the Trust Wallet Browser Extension and choose the option to connect your Ledger.
Note:
- If you’re using the Trust Wallet Browser Extension for the first time: Open the extension > choose “Connect your Ledger wallet” > create a password > then proceed directly to Step 2 below.

OR:
- If you previously set up Trust Wallet: Open the extension > enter your password > click the wallet selector located underneath your balance > Manage wallets > Add new wallet > choose “Connect your Ledger wallet” > then proceed to Step 2 below.

Step 2: Connect your Ledger device to your computer.
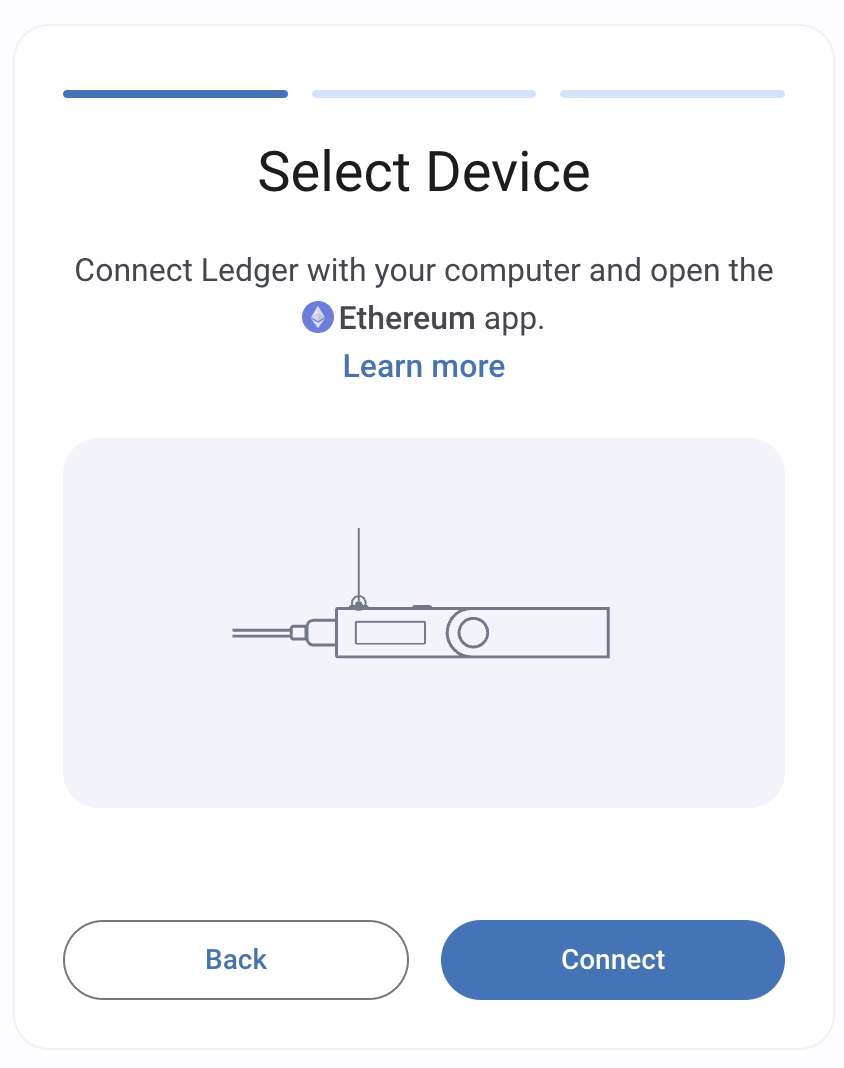
Start by connecting your Ledger to your computer using the USB cable, then unlock it using your PIN.
Next, you’ll open the appropriate blockchain application on your Ledger to ensure a smooth connection to the Trust Wallet Browser Extension.
For example, locate the Ethereum app on your Ledger device.

Then press both buttons on your Ledger device at the same time.
Your screen will display that the Ethereum Application is ready.

Then click the “Connect” button on the Trust Wallet Browser Extension.
Step 4: Give Trust Wallet permission to connect your Ledger by selecting the device name and clicking the “Connect” button.
To ensure a smooth connection, ensure that your Ledger device is properly connected to your computer and unlocked.

Step 5: Select the Ledger addresses you want to access via Trust Wallet and click “Continue”.
If applicable, select a usage sharing option.
Note: Various addresses are generated from your Ledger secret phrase, which is why you see multiple addresses. You have the choice to use any of them you prefer.
Note: If you see “Added” beside one of your Ledger addresses and you are unable to select it, that means it was already added to the Trust Wallet Extension. Also you can use the “Next” and “Previous” links scroll through the different Ledger addresses you can choose from.

And that’s it! You can now view and manage your Ledger wallet address using the Trust Wallet Browser Extension.
Next: Click “View wallet now” to open the extension and start using your connected wallet.

Don’t see all your coins and tokens?
Currently, you can only access EVM-compatible blockchains on your Ledger via the Trust Wallet Browser Extension. Supported networks include Ethereum, BNB Chain, Polygon, Avalanche, and all other EVM blockchains.
However, if you don’t see all your ERC20 tokens, you can add them as a custom token like this:
- Click the filter icon on the Trust Wallet extension
in the top right corner
- Click “Add custom token” and select the token network.
- Paste in the contract address for the token you’re adding, and click “Add token”.
Understanding the difference between Ledger and Trust Wallet addresses
You can add and manage both Trust Wallet addresses and Ledger Wallet addresses within the Trust Wallet Browser Extension.
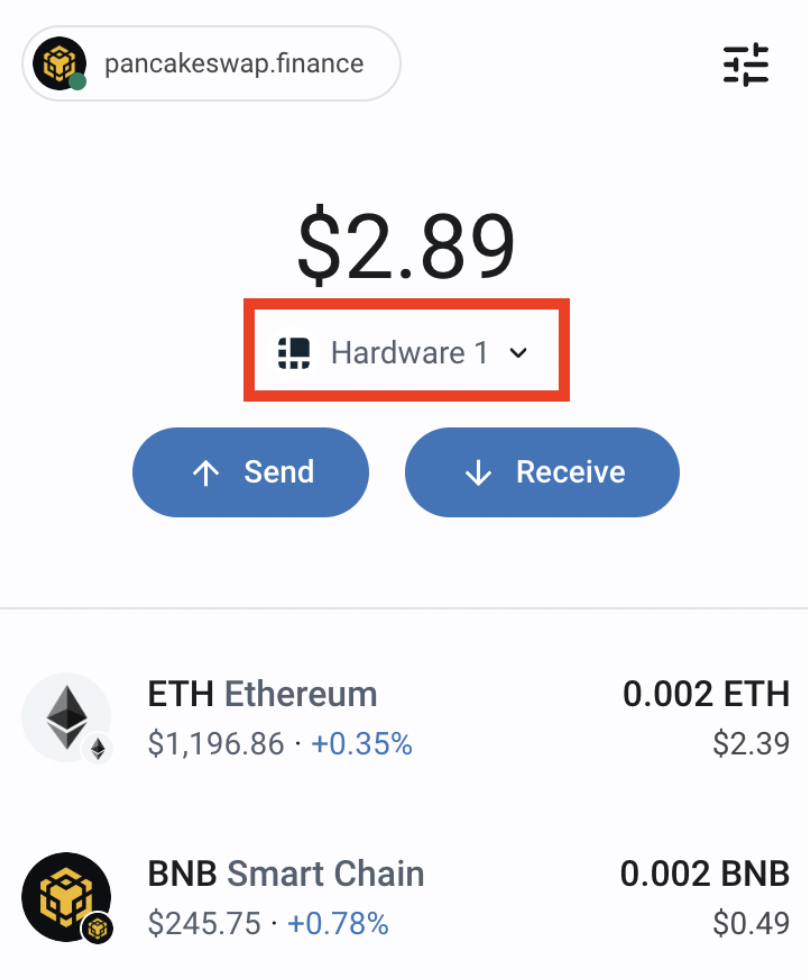
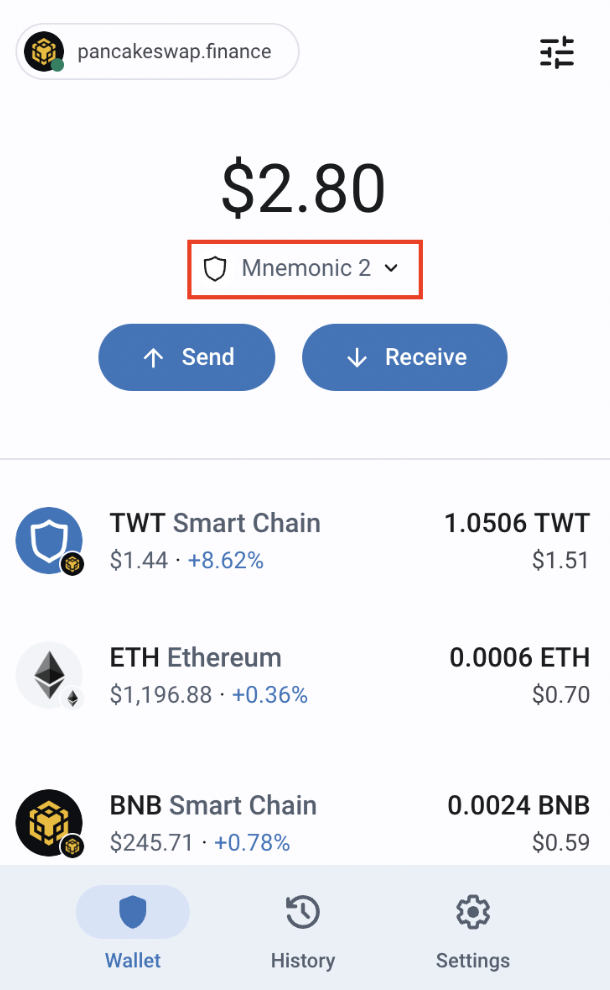
However, when you connect your Ledger wallet to the browser extension, you might be wondering whether you’re looking at your Ledger wallet address or your Trust Wallet address. The easy way to know is to look at the icon in the wallet selector tool underneath your wallet balance:
- A Trust Wallet
icon will appear when you’re viewing a Trust Wallet address
- A Ledger icon
will appear when you’re viewing a Ledger wallet address
The key thing to note is that although you can see both your Trust Wallet and your Ledger Wallet in one convenient interface, they are completely separate wallets.
Key differences to note include:
-
Trust Wallet is a “hot wallet”, which is secured by the 12-word secret phrase generated when you set up your wallet.
-
Ledger is a “cold wallet”, which is secured by its 24-word secret phrase generated when you set up your Ledger device.
-
In your Trust Wallet, the permission to sign dApp transactions and send crypto out from the wallet is controlled directly in the web extension.
-
Even though your Ledger wallet shows in Trust Wallet, the permission to sign dApp transactions and send crypto out from the wallet is controlled by your physical Ledger device.
When doing transactions on your Ledger using the Trust Wallet Browser Extension, there will always be the extra step of physically confirming transactions on the hardware device.
Additionally, using the “multi-wallet” feature of the browser extension, you can seamlessly toggle between your Trust Wallet addresses and Ledger wallet addresses.
Manage multiple wallets, including Ledger, using “Multi-wallet”
Trust Wallet’s “multi-wallet” feature allows you to add, import, and manage multiple wallets in one convenient place.
Use multi-wallet to:
- Add or import new wallets, so you can manage them in one place
- Quickly switch between wallets
- Easily send crypto from one wallet to the other
- Create wallets for specific purposes – for instance, you might set up a wallet just for connecting to DeFi dApps, and another for daily spending
- Nickname your wallets, so you can easily track them
- Remove wallets you’ve previously added
Add a new wallet or toggle between wallets (including your Ledger)
Step 1: Click on the wallet selector option underneath your balance to add or access different wallets:
Step 2: Click “Add new wallet” and follow the instructions to add an additional wallet to the Trust Wallet Browser Extension.
Note – the wallet selector underneath your balance will display:
- a Trust Wallet
- a Ledger icon
Simply click the wallet selector at any time to switch different Trust Wallet addresses, or between a Trust Wallet address and a Ledger address.
Send crypto from one wallet to another with “multi-wallet”
Let’s look at an example where you use the Trust Wallet Browser Extension to send ETH from your Ledger wallet address to your Trust Wallet address.
Step 1: Get the deposit address of the wallet you want to receive the crypto
- Click the wallet selector underneath your balance, and select the wallet address you want to receive the crypto. In this example, it’s the Trust Wallet address.
- Click the “Receive” button

- Select the asset you’ll transfer – in this example it’s ETH
- Copy the deposit address
Step 2: Send crypto from your other wallet to the deposit address
- Go back to the main balances page of your wallet, click the wallet selector option, and select the wallet you will send the crypto from. In this example, it’s Ledger.
- Click “Send”

- Choose the asset – again, it’s ETH in this example
- Paste the deposit address, and enter the amount you want to send
- Click “Preview” to view the details of the transfer, then click “Confirm” to send the crypto

Now you’ll get a prompt on your Ledger device. You need to review and confirm the transaction directly on your Ledger.
When you see the “Review transaction” prompt, use the buttons or the applicable option on your Ledger to scroll through the details.

Accept and send the transaction from the “Accept and send” screen.

Once you approve the transaction, you’ll then see a screen on the Trust Wallet Browser Extension of the transaction processing (Pending) on the blockchain and confirmation (Success).

And that’s it!
And remember, you can easily send digital assets between unique Trust Wallet addresses, or Ledger addresses.
Give your wallet a custom nickname
You can easily rename a wallet to a custom name. This is useful if you want to create wallets for a specific purpose and easily keep track of them.
For example, you might have a wallet set up just for accessing DeFi dApps, daily transactions, long-term cold storage and so on.
Step 1: Click the wallet selector underneath your balance, then choose “Manage wallets”.
Step 2: Click on the 3 dots next to the wallet you want to rename, then select “Change wallet name”.
Step 3: Create your custom name and click on “Confirm”.
Remove a wallet
Step 1: Click the wallet selector underneath your balance, then choose “manage wallets”.
Step 2: Click on the 3 dots next to the wallet you want to remove, then select “Remove wallet”.
Step 3: Confirm your understanding of removing the wallet.
Send crypto from your Ledger using Trust Wallet
Step 1: Ensure your Ledger wallet is selected in the Trust Wallet Browser Extension.
Use the wallet selector to choose your Ledger wallet, if required.
Step 2: Click “Send”.
Step 3: Choose the asset you want to send.
Step 4: Paste in the address of where you’re sending the crypto, and enter the amount you want to send.
Step 5: Click “Preview” to view the details of the transfer, then click “Confirm”.
Once you click Confirm in the browser extension, your Ledger device will prompt you to review the transaction details directly on the Ledger device.
Use buttons on your Ledger device to scroll through the details.
Step 6: Finally, approve the transaction on your Ledger device.
And that’s it! You’ve sent crypto from your Leder via Trust Wallet.
Once you approve the transaction, you’ll then see a screen on the Trust Wallet Browser Extension of the transaction processing (Pending) on the blockchain and confirmation (Success).
Sign dApp transactions from your Ledger via Trust Wallet
When you combine Trust Wallet and your Ledger to access dApps, spending control is still ultimately controlled by the physical Ledger device.
In other words, any dApp transaction that requires you to send crypto out from your wallet will require you to physically give permission on your Ledger device.
In this example, we’ll show you how to safely connect to a dApp with Trust Wallet, then securely access and swap tokens that are in your Ledger.
Step 1: Use your web browser to navigate to a Web3 dApp. In this example, we’ll use app.uniswap.org.
Step 2: Click “Connect”.
Note: On most dApps websites this button could say something like Connect wallet, or Connect.
Step 3: Allow the permissions for the dApp to access the Trust Wallet Browser Extension.

Step 4: Perform a swap

Step 5: Confirm the transaction on Trust Wallet

Step 6: Review and confirm the transaction on your Ledger device
Once you click Confirm in the browser extension, your Ledger device will prompt you to review the transaction details directly on the Ledger device.

Use buttons on your Ledger device to scroll through the details.
Step 7: Finally, approve the transaction on your Ledger device.

And that’s it! You’ve sent crypto from your Leder via Trust Wallet.